Howard Miller wall clocks are renowned for their exceptional craftsmanship and precise timekeeping. Combining traditional aesthetics with modern functionality, they offer a timeless addition to any home decor.
1.1 Overview of Howard Miller Clocks
Howard Miller wall clocks are crafted with precision and attention to detail, offering a blend of traditional designs and modern functionality. Known for their reliability and aesthetic appeal, these clocks feature high-quality materials and mechanisms. Many models include intricate chimes and pendulum movements, enhancing their charm. Designed to complement various home decors, Howard Miller clocks are a perfect fusion of form and function, ensuring accurate timekeeping while adding elegance to any room.
1.2 Importance of Proper Setup and Maintenance
Proper setup and maintenance are crucial for ensuring the longevity and accuracy of Howard Miller wall clocks. Incorrect installation can lead to mechanical issues, while regular cleaning and lubrication of moving parts prevent wear and tear. Following the manufacturer’s instructions ensures the clock operates smoothly and maintains its aesthetic appeal. Neglecting these steps may result in chime malfunctions or timekeeping inaccuracies, emphasizing the need for careful attention to setup and ongoing care.

Unboxing and Initial Setup
When unboxing, carefully unpack the clock and ensure all shipping materials are removed. Inspect for damage and handle with care, using gloves or a soft cloth to prevent scratches.
2.1 Unpacking the Clock Safely
When unpacking your Howard Miller wall clock, carefully remove it from the shipping carton. Use scissors to cut rubber bands and gently take out foam, Styrofoam, and cardboard inserts. Handle the clock with care, using cotton gloves or a soft cloth to prevent scratches. Inspect the clock for any shipping damage before proceeding. Ensure all components, such as keys and hardware, are accounted for. This step ensures your clock is prepared for proper setup and maintenance.
2.2 Removing Shipping Materials
Howard Miller clocks are secured with rubber bands, foam, Styrofoam, metal, and cardboard during shipping. Carefully cut rubber bands and remove foam inserts to avoid damaging the clock. Gently take out Styrofoam and cardboard pieces, ensuring no parts remain attached. Use scissors or a soft tool to release any stuck materials. Once all packaging is removed, inspect the clock for any residue or marks. This ensures the clock is free from shipping obstructions and ready for setup.
Hanging the Wall Clock
Wear cotton gloves or use a soft cloth to handle the clock. Locate the pendulum guide through the front door or back access panel and hang carefully.
3.1 Choosing the Right Location
Choosing the right location for your Howard Miller wall clock is crucial for both functionality and aesthetics. Select a wall with stable support to avoid vibrations that could affect timekeeping. Avoid direct sunlight to prevent fading of the finish and overheating of the clock’s internal mechanisms. Ensure the area is level and clear of obstructions, especially for pendulum models, which require space for proper swing. Place the clock near a power source if it’s a quartz model and consider the room’s décor to enhance visual appeal.
3.2 Securing the Clock to the Wall
Secure the Howard Miller wall clock using the provided hanging hardware. Locate the wall stud for added stability and use wall anchors if necessary. Ensure the clock is level by adjusting the mounting bracket or hardware. Hang the clock at eye level for optimal visibility and aesthetic appeal. Double-check the weight capacity of the hardware to ensure it supports the clock’s weight. If the clock is heavy, consider enlisting a second person to assist with hanging and securing it firmly to the wall.
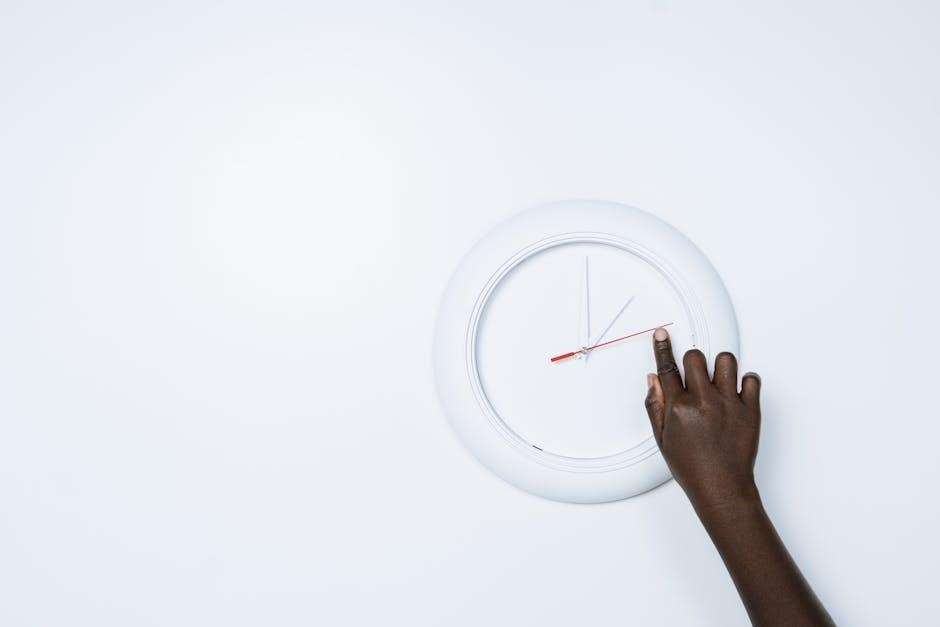
Setting the Time Accurately
Setting the time on your Howard Miller wall clock involves synchronizing the hour and minute hands accurately to ensure precise timekeeping and proper functionality. Use the provided instructions for best results.
4.1 Adjusting the Hour and Minute Hands
To accurately set the time, move ONLY THE MINUTE HAND counterclockwise until both the hour and minute hands align with the correct time. Always ensure the hands move clockwise to maintain proper functionality. Avoid moving the hour hand directly, as it may cause misalignment. If the clock chimes during adjustment, wait for the chiming to complete before proceeding. This ensures precise synchronization and smooth operation of your Howard Miller wall clock.
4.2 Synchronizing the Chime Function
Ensure the chime function is properly synchronized with the correct time. After setting the hands, verify that the chime corresponds to the appropriate hour. If the clock begins to chime during adjustment, stop moving the hands until the chiming is complete. The clock features a self-correcting mechanism to maintain accurate chime timing. Proper synchronization ensures the chimes align with the correct hour, enhancing the clock’s functionality and aesthetic appeal in your home. Always follow the manufacturer’s guidelines for optimal performance.

Pendulum Installation and Adjustment
Properly installing and adjusting the pendulum ensures accurate timekeeping. Locate the pendulum guide through the front door or back access panel, then gently hang and fine-tune it.
5.1 Hanging the Pendulum Guide
To hang the pendulum guide, locate it through the front door or back access panel. Gently hold the guide with one hand and attach the pendulum. Ensure it aligns properly and swings freely. Wear cotton gloves or use a soft cloth to prevent damage. Once secured, check the pendulum’s motion to confirm smooth operation. Proper installation is crucial for accurate timekeeping. Refer to the manual for specific instructions tailored to your clock model.
5.2 Fine-Tuning for Accurate Timekeeping
After hanging the pendulum, ensure it swings evenly and consistently. Adjust the pendulum’s rating nut to fine-tune its alignment. Monitor the clock’s accuracy over a few days, making small adjustments as needed. The pendulum’s proper swing ensures precise timekeeping. Refer to the manual for specific instructions on adjusting the nut and aligning the pendulum. Proper fine-tuning guarantees optimal performance and reliable timekeeping for your Howard Miller wall clock.
Troubleshooting Common Issues
Identify and resolve issues like chime malfunctions or time inaccuracy. Address chime problems by ensuring correct synchronization and proper hand alignment. For timekeeping errors, adjust the pendulum and verify weight alignment. Regular maintenance and correct setup prevent most issues. Always refer to the manual for specific troubleshooting steps tailored to your clock model.
6.1 Fixing Chime Malfunctions
To address chime malfunctions, ensure the clock hands are synchronized correctly. If the clock chimes inaccurately, stop moving the hands until the chime sequence completes. Next, adjust the minute hand counterclockwise to align it with the correct time. Ensure the chime selector is set properly and verify that all mechanical connections are secure. If issues persist, consult the manual or contact Howard Miller support for further assistance. Regular maintenance can prevent such malfunctions.
6.2 Addressing Time Inaccuracy
If your Howard Miller wall clock is running fast or slow, adjust the time by moving only the minute hand counterclockwise until the hour and minute hands align correctly. Ensure the pendulum is properly installed and swinging evenly. If the clock has a self-correcting feature, allow it to adjust naturally. For persistent inaccuracies, refer to the manual or contact customer support for guidance. Regular checks and proper setup can help maintain precise timekeeping. Always handle the clock with care to avoid mechanical disruption.
Maintenance and Care Tips
Regularly clean the clock face with a soft cloth and ensure moving parts are well-lubricated. Handle the clock gently to maintain its precision and aesthetic appeal.
7.1 Cleaning the Clock Face and Hands
Regular cleaning is essential to maintain the clock’s appearance and functionality. Use a soft, dry cloth to gently wipe the clock face and hands, removing dust and fingerprints. Avoid harsh chemicals or abrasive materials that could damage the finish. For glass-covered clocks, use a mild glass cleaner and a lint-free cloth to prevent streaks. Always handle the clock with care to avoid scratches or misalignment of the hands. Consult the product manual for specific cleaning instructions tailored to your clock model.
7.2 Lubricating Moving Parts
Lubricating moving parts ensures smooth operation and extends the clock’s lifespan. Use a high-quality clock oil for the bearings and pivot points. Apply a few drops to the pivot holes and gently rotate the parts to distribute the oil evenly. Avoid over-lubrication, as excess oil can attract dust and cause malfunctions. Lubricate the pendulum hinge if applicable. Always refer to the product manual for specific lubrication instructions tailored to your Howard Miller wall clock model.

Accessing Howard Miller Manuals
Access Howard Miller manuals online through their official website. Search by model number or product name to download setup guides, care tips, and troubleshooting steps.
8.1 Downloading Product Manuals Online
Visit the official Howard Miller website to download product manuals for your wall clock. Use the search feature by entering the model number or product name. Manuals include setup guides, care tips, and troubleshooting steps, ensuring you can maintain and repair your clock effectively. Accessing these resources online is convenient and provides detailed instructions tailored to your specific timepiece.
8.2 Contacting Customer Support
For assistance with your Howard Miller wall clock, visit their official website and navigate to the customer support section. Provide your clock’s model number or serial number for accurate identification. This ensures prompt and effective resolution to any inquiries or issues. Support is available for troubleshooting, part replacements, or setup guidance, helping you maintain your timepiece efficiently.